Setting Sharing Permissions for
Google Docs and Google Sites
Created by the Student Multimedia Studio specifically for Students, Faculty and Staff at Kent State University
Contents
Setting Sharing Permissions for Google Docs ...................................................... 1
Login to Flashline and Google Docs .......................................................................................................... 1
The Easiest Way to Share Google Documents ..................................................... 2
USE “GET THE LINK TO SHARE” ................................................................................................................. 2
Create a Link that Kent State University users only can use to view your document. ............................. 2
Create a Link that anyone in the world can use to view your document without signing in ................... 2
To Copy the Link ........................................................................................................................................ 3
Setting Sharing Permissions on Documents......................................................... 3
INVITE PEOPLE TAB ................................................................................................................................... 4
PEOPLE WITH ACCESS TAB ........................................................................................................................ 5
ADVANCED PERMISSIONS TAB .................................................................................................................. 5
Setting Sharing Permissions for Google Sites ...................................................... 6
INVITE PEOPLE TO YOUR SITE ................................................................................................................... 7
ADVANCED PERMISSIONS ......................................................................................................................... 7
1
Setting Sharing Permissions for Google Docs
Important Note: The sharing permissions you set for your Google Documents will also apply to
them if you include them as attachments or insert them onto pages on your Google Sites.
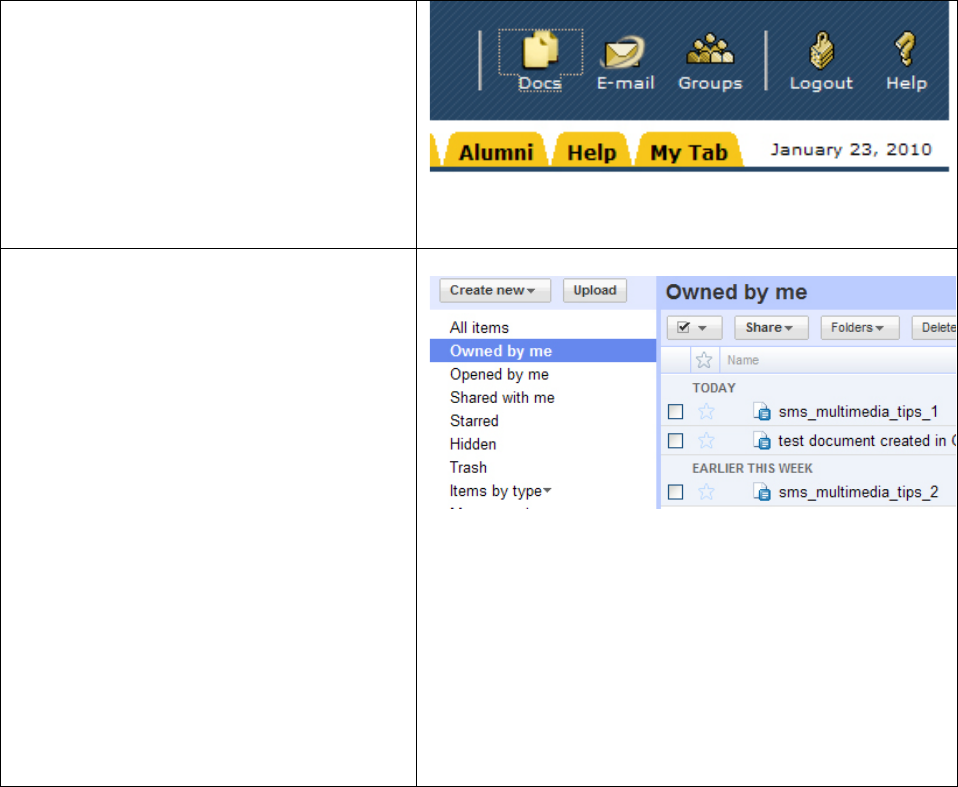
Login to Flashline and Google
Docs
Login to Flashline then click on the
Docs
icon on the Flashline Welcome page to
open Google Docs in a new browser
window.
After Creating and Saving or Uploading
documents into Google Docs, choose the
Owned by Me link on the left panel (if it’s
not already selected).
All the documents “owned by you” will now
appear in the Owned By Me window on the
right.
If you want to see all the items that you
own and those which others shared with
you, choose the ALL ITEMS link on the left
panel.
Note: Generally, you can only change
sharing permissions or share documents by
generating a link if you own it unless you’ve
been given permission to do so by other
who shared a document with you AND gave
you editing privileges.
2
The Easiest Way to Share
Google Documents
USE “GET THE LINK TO SHARE”
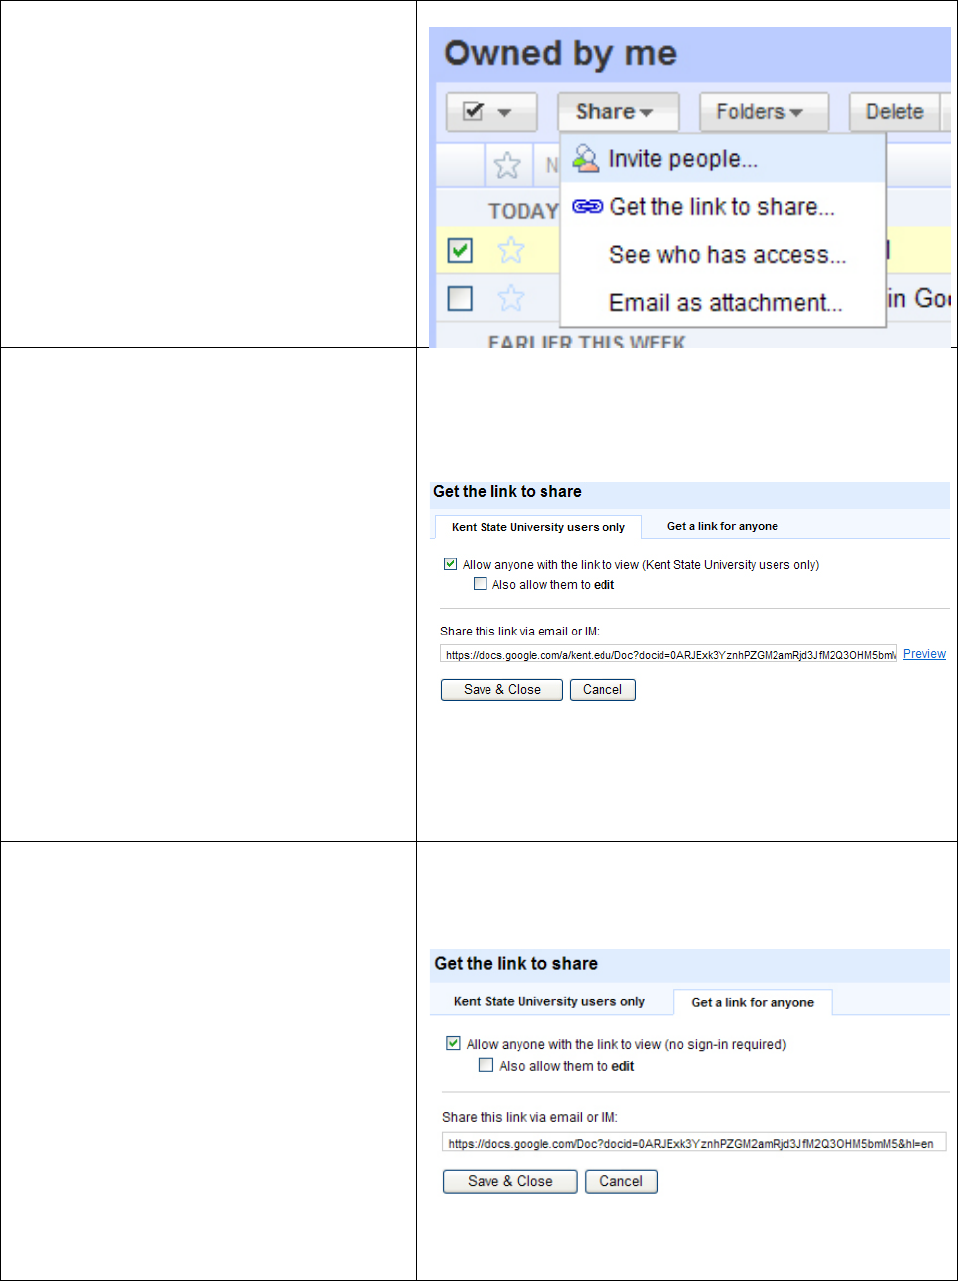
The easiest way to “share” documents is to:
1. Click on the Share button
2. Choose Get the link to share…
Then choose from the following:
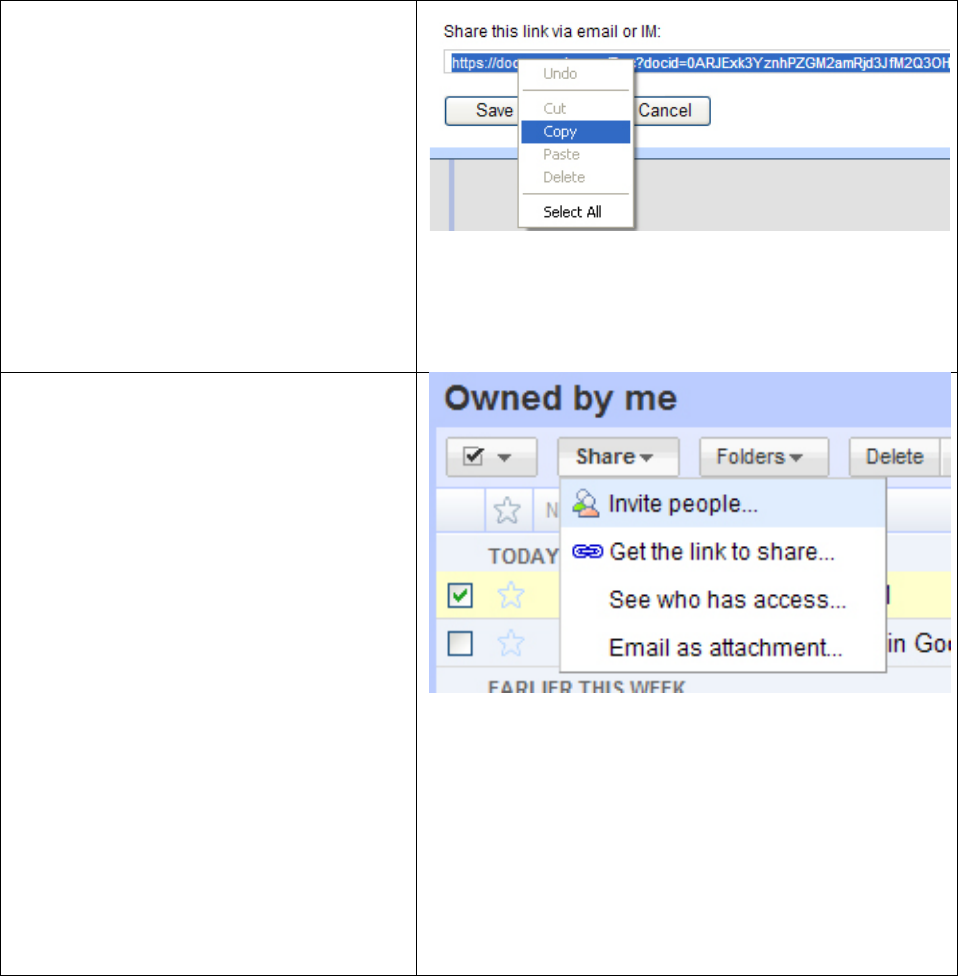
Create a Link that Kent State
University users only can use to
view your document.
If you copy and paste the link generated
below (which is a web URL) into an email or
create a hyperlink on a web page, like a
page on a Google Site, then….
Anyone with a Kent State University
Flashline Account will be able to view the
document but they will have to sign-in to
do so.
You can also allow them to edit the
document if you want.
Be sure to click SAVE & CLOSE when
you’re done.
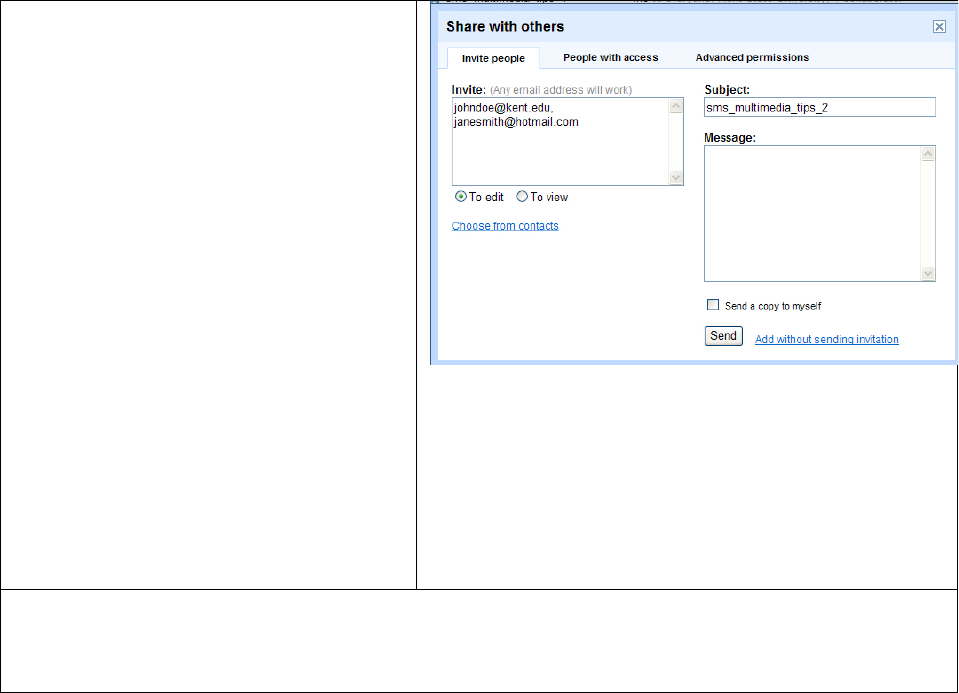
Create a Link that anyone in the
world can use to view your
document without signing in
The link created by choosing Get a Link for
Anyone > Allow anyone with the link to
view (no sign-in required) inserted onto a
web page on a Google Site will allow
“anyone in the world” to view the Google
Document regardless of the document’s
individual “Sharing Permissions”.
You can also just email the link to them in
an email.
Be sure to click SAVE & CLOSE when
you’re done.
3
To Copy the Link
Just click on the link, it will automatically
select the entire URL. Then right click on
the selected link and choose, Copy
Setting Sharing Permissions
on Documents
In the Google Documents window, after
“checking” one or more of the documents
that you want to change sharing
permissions on:
1. Click on the Share button
2. Choose Invite people.
3. A Share with others window will
open. See below.
Keep in mind that the sharing permissions are
set for each individual document or all the
documents that you have “checked”. If there
are other documents that you didn’t check or
you add new documents, you will have to set the
sharing permissions on them too. Otherwise
they may “default” to something you don’t
necessarily want.
4
INVITE PEOPLE TAB
Type in the email address or addresses,
separated by commas, of people you want
to invite to share your document with.
Select if you want the invited people to be
able To EDIT or to just TO VIEW the
document(s).
Add a Message to the email invitation if
you want. You may want to give them
information about signing in or creating a
Google Account if you required that in the
Sharing permissions that you set (see
below).
Click the Send button.
The invited people will receive an email
with a link to the document that you shared
with them.
After sending invitation(s) to share your documents, you should immediately
setup the Sharing Permissions for everyone that has access to your documents.
Next….

5
PEOPLE WITH ACCESS TAB
A list of all the people, including yourself and
Anyone at Kent State University will appear in
this window.
You can change the type of access you’re giving
each of them: CAN EDIT, CAN VIEW or NONE
Note that Anyone at Kent State University is in
the list of People with Access. Be sure to select
what you want them to be able to do with the
document or choose “None” if you don’t want
Anyone at Kent State University to have access
to your document(s) at all.
PEOPLE WITH ACCESS TAB (continued)
Choose whether or not you want people to
have to SIGN IN to view the document by
clicking on the hyperlinked text, Change.
The options are:
• Always require sign-in
• Let people view without signing in
• Let people edit without signing in
ADVANCED PERMISSIONS TAB
You can also:
• Allow editors (peope that you’ve given
permission TO EDIT) to invite others to
edit or view
• Allow invitations to be forwarded
Consider these options carefully. By default
neither is allowed.
Important Note: Always remember to click on the SAVE AND CLOSE button after you’ve made
changes. If you don’t, the Sharing Permissions you chose will not be saved.
6
Setting Sharing Permissions for Google Sites
Important Note: The sharing permissions you set for your Google Sites do not affect the Sharing
Permissions you have set on any Google Docs that you include on your sites. For example, even if you
set your Google Site’s sharing permissions so that Anyone in the World can view it without signing in or
creating a Google account, they still won’t be able to view a document on the Site if the Sharing
Permission on the Google Document is set to require them to sign-in or have a Google account.
The exception would be links to Google Documents on Google Sites created by using Google Doc’s Get
the Link to Share tool (See Setting Sharing Permissions for Google Docs above)
You can set up most of the Sharing Privileges
when you create a new site but you can also
change them at any time.
You may want to start by not sharing it with
anyone while you’re creating the site then allow
people to view the site after you finish it.
You might also want to share the site with
“collaborators” who you give permission to edit
the site and or add comments during the
construction process.
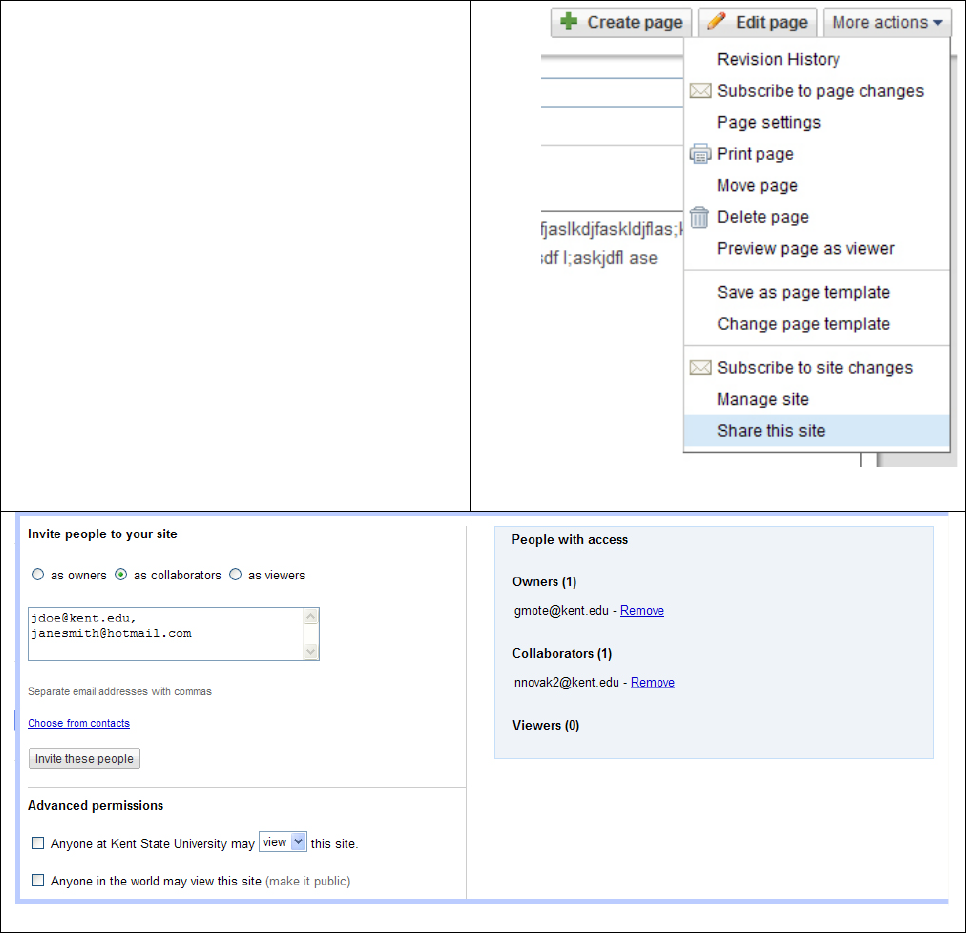
To change Sharing Permissions:
1. Click on the MORE ACTIONS tab at the
top right of the Google Site’s page
2. Choose SHARE THIS SITE
The window shown below will open.
Note that you can REMOVE “People with Access” at any time.
7
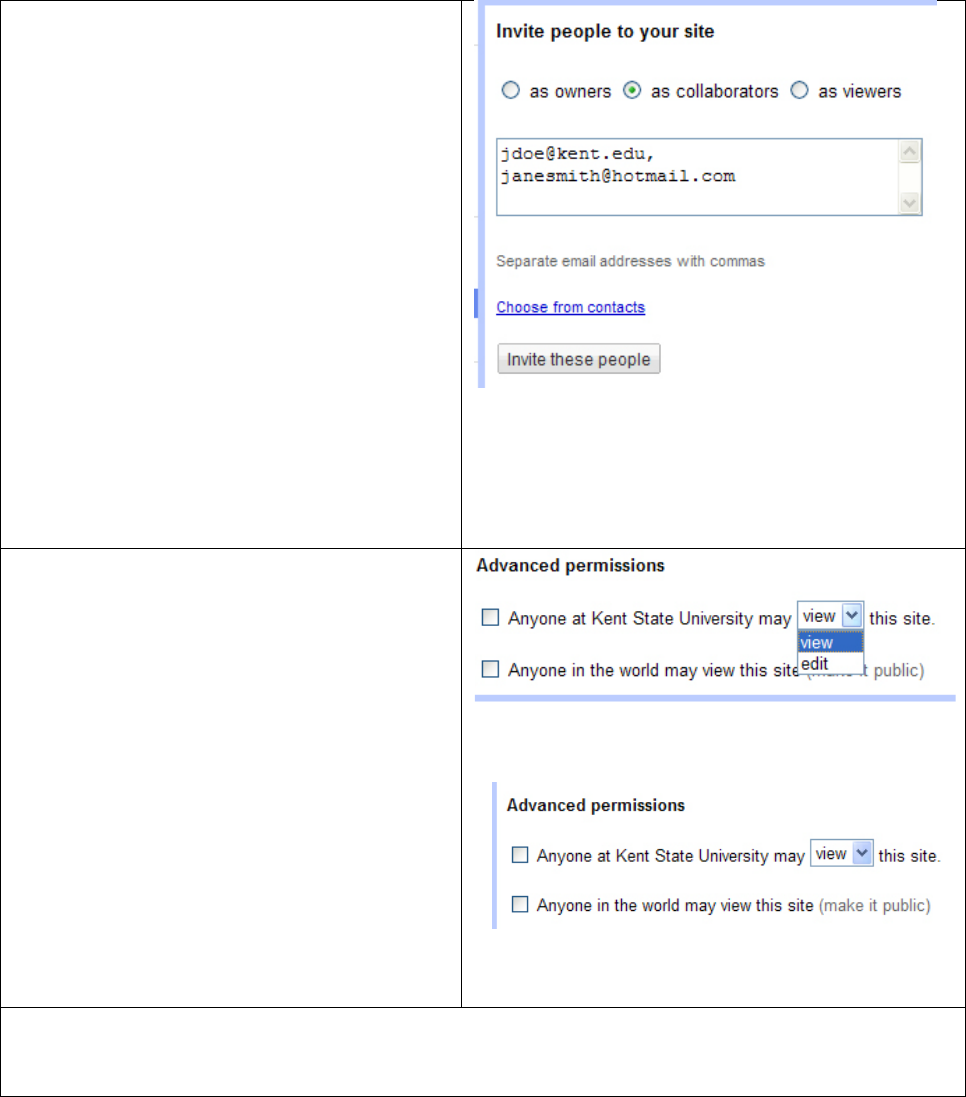
INVITE PEOPLE TO YOUR SITE
Type in the email address or addresses,
separated by commas, of people you want to
invite to view your Google Site. Select from
these options:
• AS OWNERS
This will allow them to do everything,
including inviting other, editing and creating
new pages, etc… everything you can do.
• AS COLLABORATORS
Allows them to only edit pages, create new
pages, add comments, etc. but not invite
others and other “site management” things.
• AS VIEWERS
They can only view the site.
Click the INVITE THESE PEOPLE button to send
email invitations to people you want to invite.
ADVANCED PERMISSIONS
• Anyone at Kent State University may:
[VIEW] or [EDIT] this site.
Select the option you want.
• Anyone in the world may view this site
(make it public)
If you choose this option, you make the site
“public” and, as it states, anyone in the
world will be able to view your site without
the need to sign-in or create a Google
account to view the site.
Click on the RETURN TO SITE text hyperlink to
return to your Site’s Pages for editing.
Note: If you don’t check either one of the above Advanced Permissions options then only those
people you specifically “invite” to your site will be able to view, collaborate or share ownership
of your site. (see INVITE PEOPLE TO YOUR SITE above)
